Just about every PC user encounters compressed files in formats such as ZIP and RAR at one time or the other. The most common format is ZIP and Windows has a built-in function for managing ZIP files. However, it is a pretty minimal feature. You don’t have to be a power user to find that you prefer to install and use one of the free multi-featured file archivers.
Several good programs are reviewed at Gizmo’s Freeware and 7-Zip is the editor’s choice. This happens to also be my own personal choice and I have been using 7-Zip for years. Although 7-Zip is a very popular utility, many people probably just install it and use the default setup. However, 7-Zip can be configured in various ways and you may want to set it up so that it better fits the particular way that you work. Here is how to get the best use from 7-Zip.
Configure file associations
Normally, Windows Explorer is the default application for ZIP files but that's about it. Clicking other archive types such as RAR will trigger a “Windows can’t open this file” message. However, 7-Zip can be made the default program for a number of archive types. The archived contents of files that are associated with 7-Zip can then be viewed and managed with 7-Zip by double-clicking the file. Here is the procedure.
- Go to the All Programs list and open 7-Zip File Manager.
- In Windows Vista/7, you’ll need to right-click the 7-Zip entry and choose “Run as administrator” in order to change file associations.
- When the 7-Zip file manager opens, click the “Tools” menu and choose “Options”. The dialog box shown in Figure 1 will open.
- With the tab “System” selected, put a check by all file types you wish to associate with 7-Zip.
- Click “Apply” if you want to go on to make the changes given in the next section or click “OK’ and close the file manager if you are done.
Figure 1. Setting 7-Zip file associations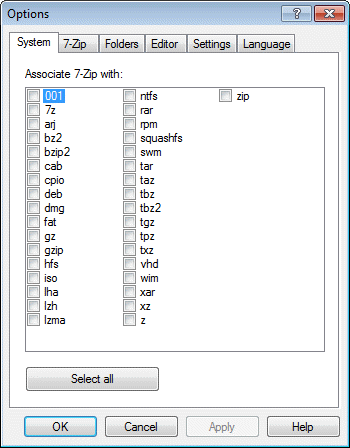
Configure the context menu entries
It is common to use 7-Zip from the Windows Explorer right-click context menu. (BTW, users with 64-bit operating systems should install the 64-bit version of 7-Zip to get proper shell integration.) A number of 7-Zip functions can be put in the context menu but you may not want all of them. It is easy to choose just the ones that you find useful.
- Continuing from step 3 or step 5 in the section above, select the tab “7-Zip”. (Remember, you’ll need to be running 7-Zip as administrator in Windows Vista/7)
- The dialog box shown in Figure 2 will open
- If you want entries for 7-Zip to appear in the Explorer context menu, check the boxes by “Integrate 7-Zip to shell context menu” and “Cascaded context menu”. Conversely, if you do not want any entries in the context menu, remove any checks by these boxes and skip to step 5.
- Place checks by any entries that you want to appear in the context menu.
- Click “OK” and close the file manager.
Figure 2. 7-Zip context menu entries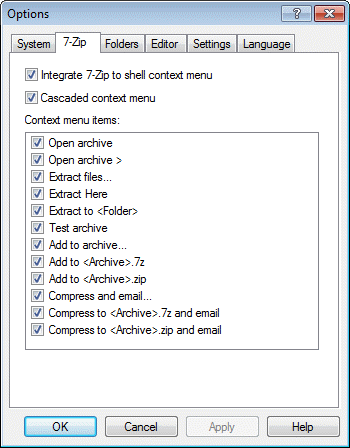
And there you have it; 7-Zip configured your way.
Get your own favorite tip published! Know a neat tech tip or trick? Then why not have it published here and receive full credit? Click here to tell us your tip.
This tips section is maintained by Vic Laurie. Vic runs several websites with Windows how-to's and tutorials, including a computer education website and a site for learning about the command line.
Click here for more items like this. Better still, get Tech Tips delivered via your RSS feeder or alternatively, have the RSS feed sent as email direct to your in-box.
 We are looking for people with skills or interest in the following areas: